List of applications
Look at the vertical menu on the left and click on the My Applications option. Here you can see the application in which you are authorized. You can also select one of the organizations to which the user belongs and show all its applications.
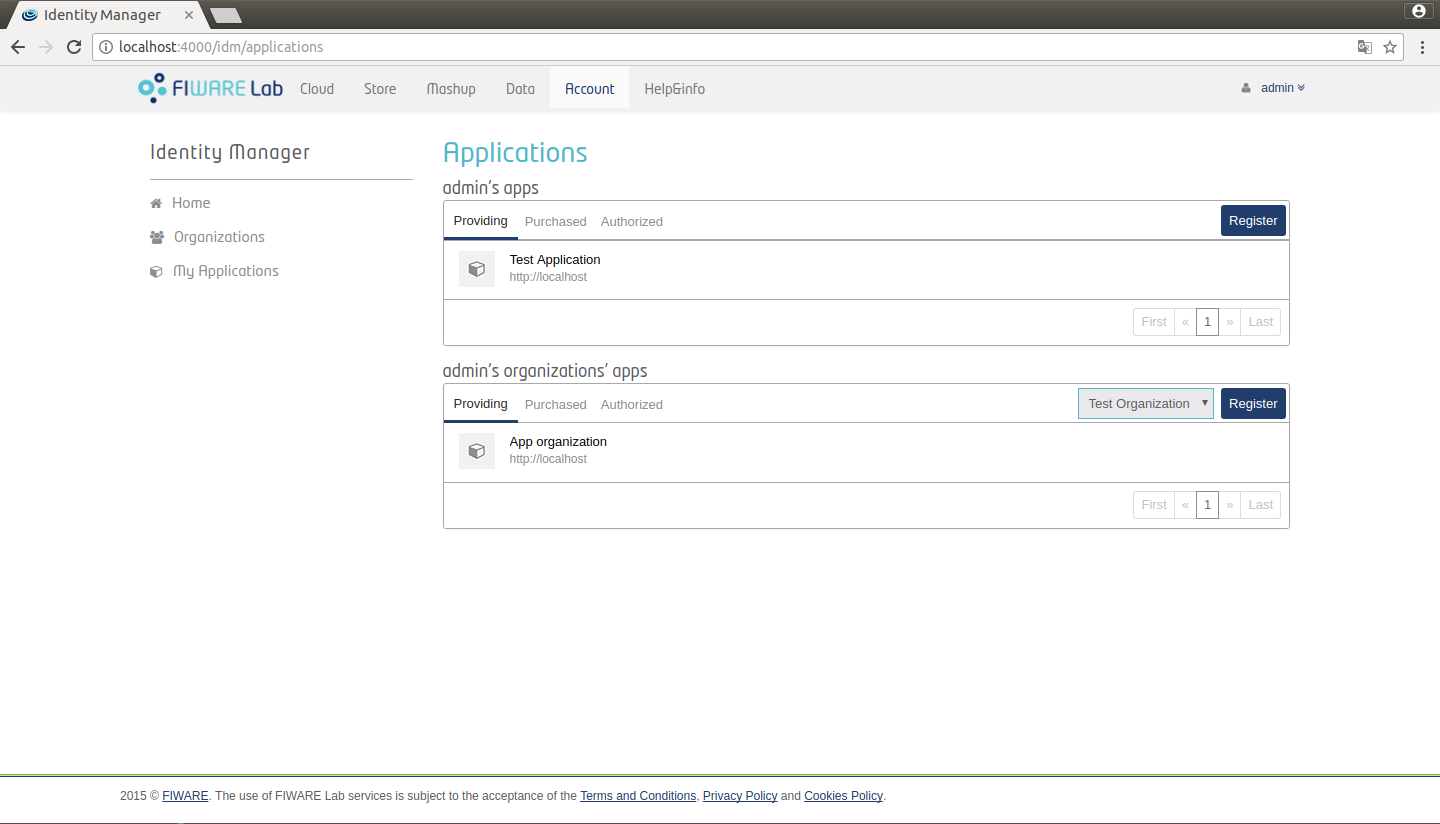
Figure 4: List user applications
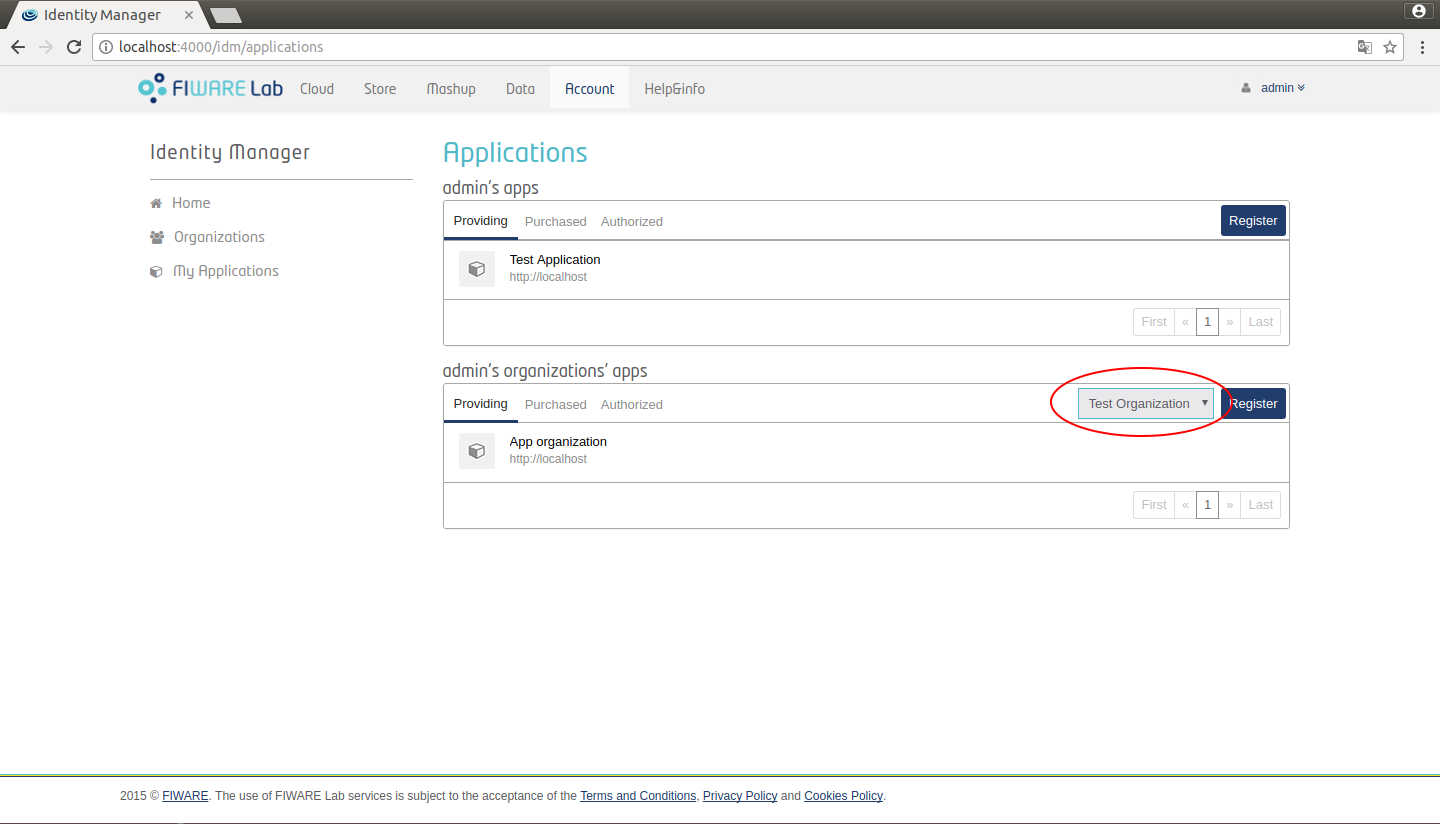
Figure 5: List organization applications
Register an application
In home page, in the Applications section you can register new application by clicking on "Register". You can also register an application from My Application page.
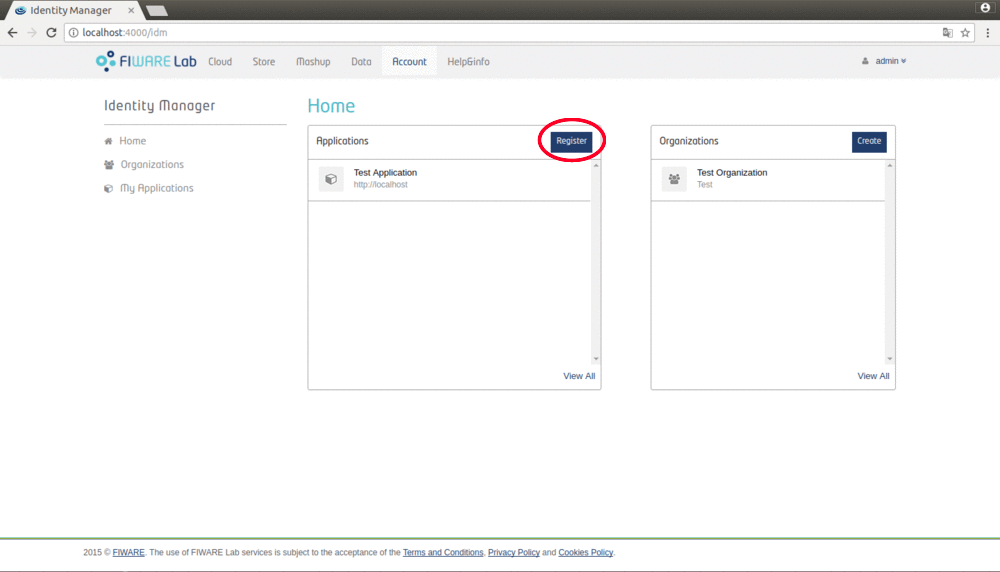
Figure 6: Home register an application
There are several attributes that are mandatory:
-
Name.
-
Description.
-
URL.
-
Callback URL. Required by the OAuth 2.0 Protocol
-
Provider. You have to choose who is going to be the provider of the application: yourself or one of the organizations in which you are owner.
Although the rest of attributes are not mandatory, it is important to understand its functionality:
-
Sign-out Callback URL. This is the URL to which Keyrock will redirect a user if a sign out is performed from a service. If is not configured it will be redirected to the domain indicated in URL parameter. See more information under sign out oauth section
-
Grant Type. You can select the different ways of obtaining an OAuth Access Token. Check Connecting to IdM with OAuth2.0.
-
eIDAS Authentication. This attributes allows your service to authenticate users by their eID. See more information in Connecting IdM to a eIDAS Node Section.
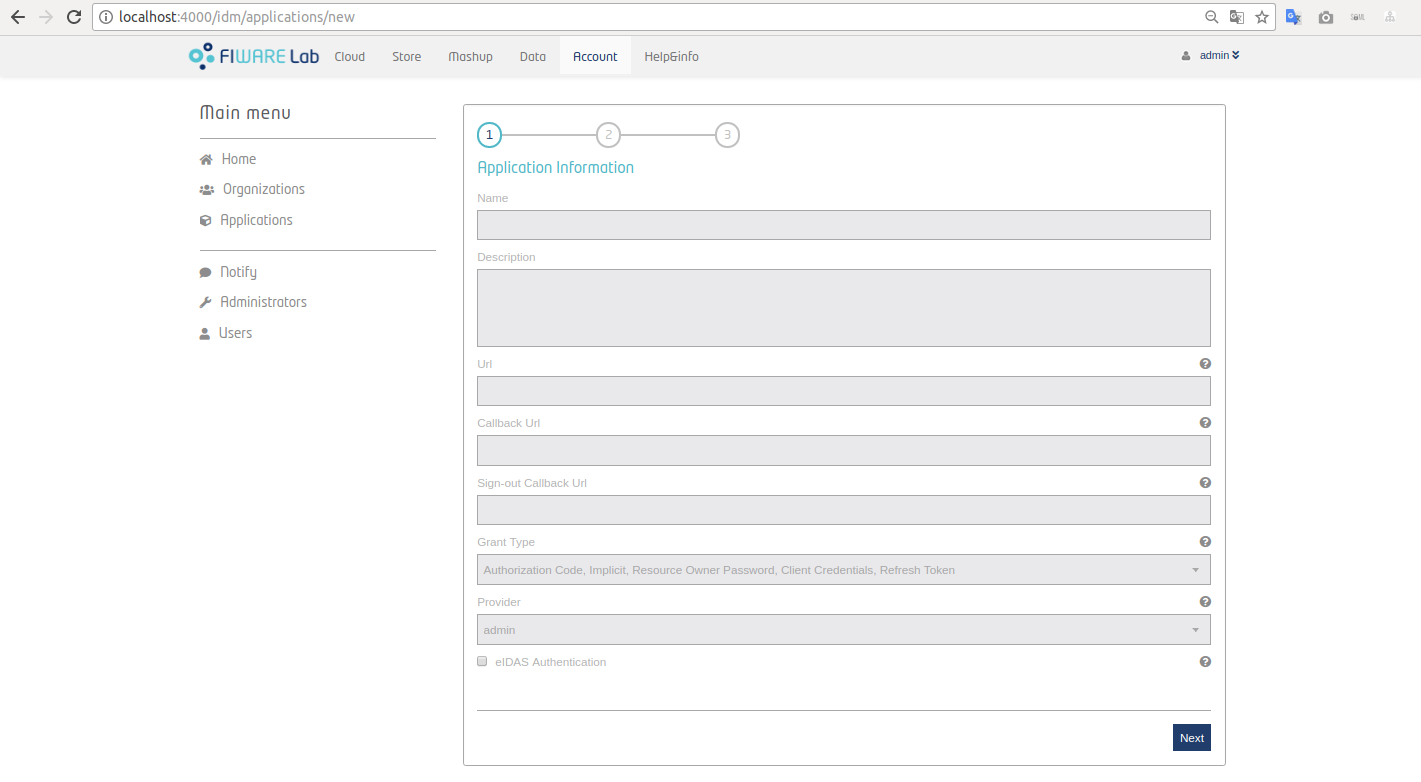
Figure 7: KeyRock Register Application
Click on "Next".
In the second step the application's logo will be loaded by selecting a valid file type. You have the option to re-frame the chosen image.
Click on "Crop Image" when you complete this process and then click "Next".
![]()
Figure 8: Upload logo Application
![]()
Figure 9: Crop image
In the third step we set up the roles and permissions of the application. In the next section it is explained.
Manage roles
In this page you will find two default roles: Provider and Purchaser. If you click in one of this roles you will see the permissions assigned to that role.
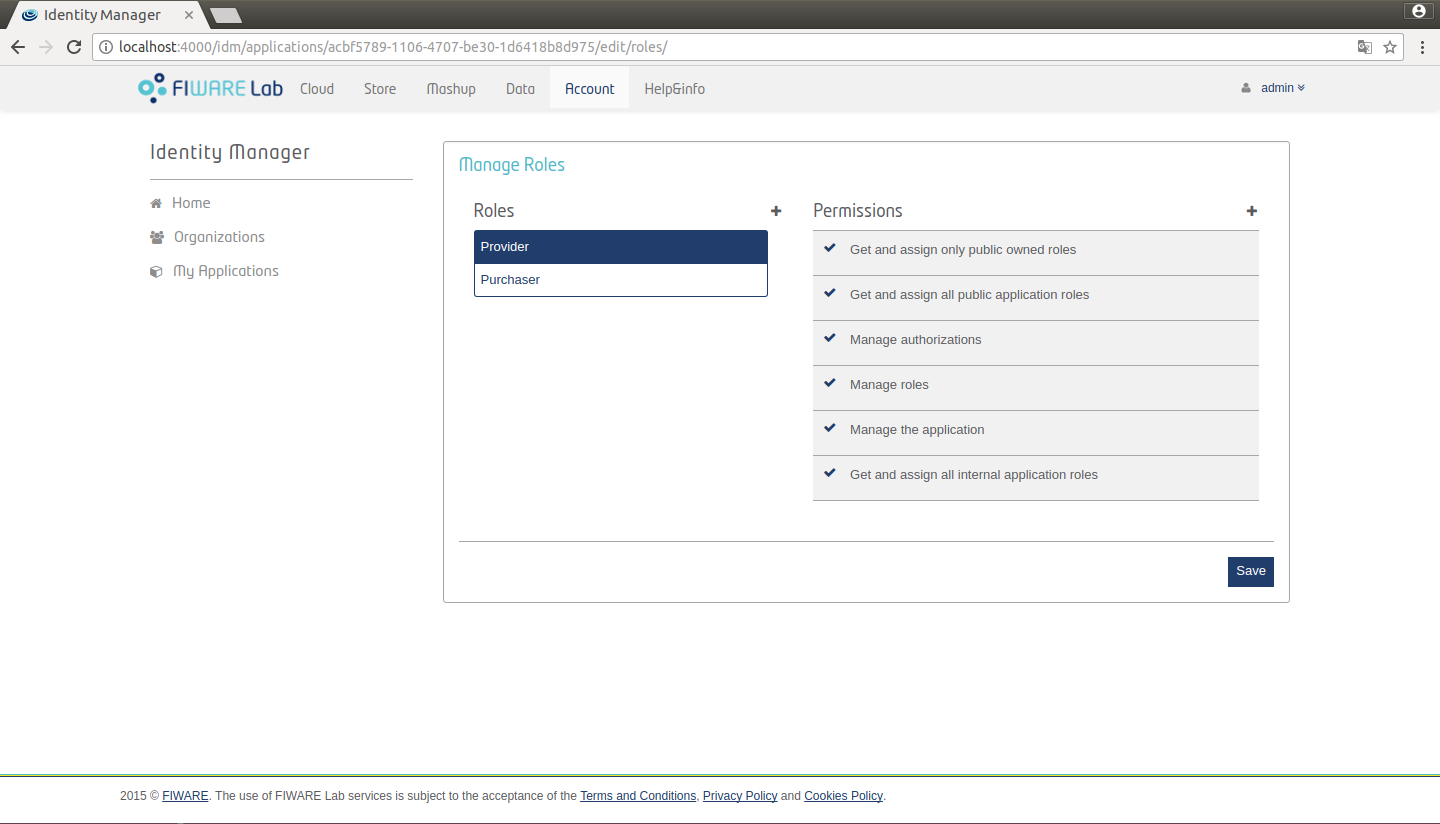
Figure 10: List of roles and permissions
You are also able to create new roles and permissions.
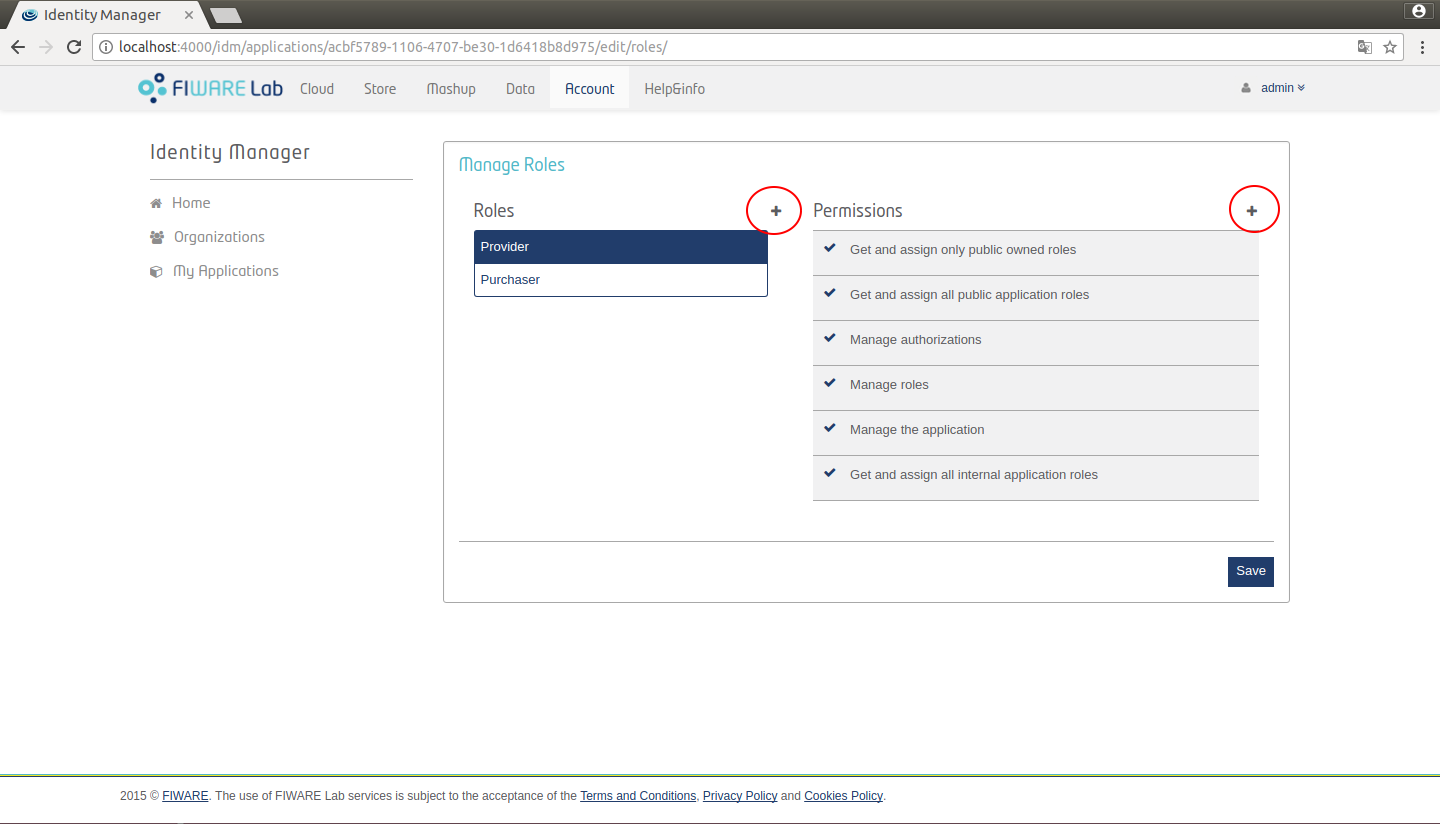
Figure 11: Create roles and permissions
To create a new role click on "New role" and write the name of role, after that click "Save".
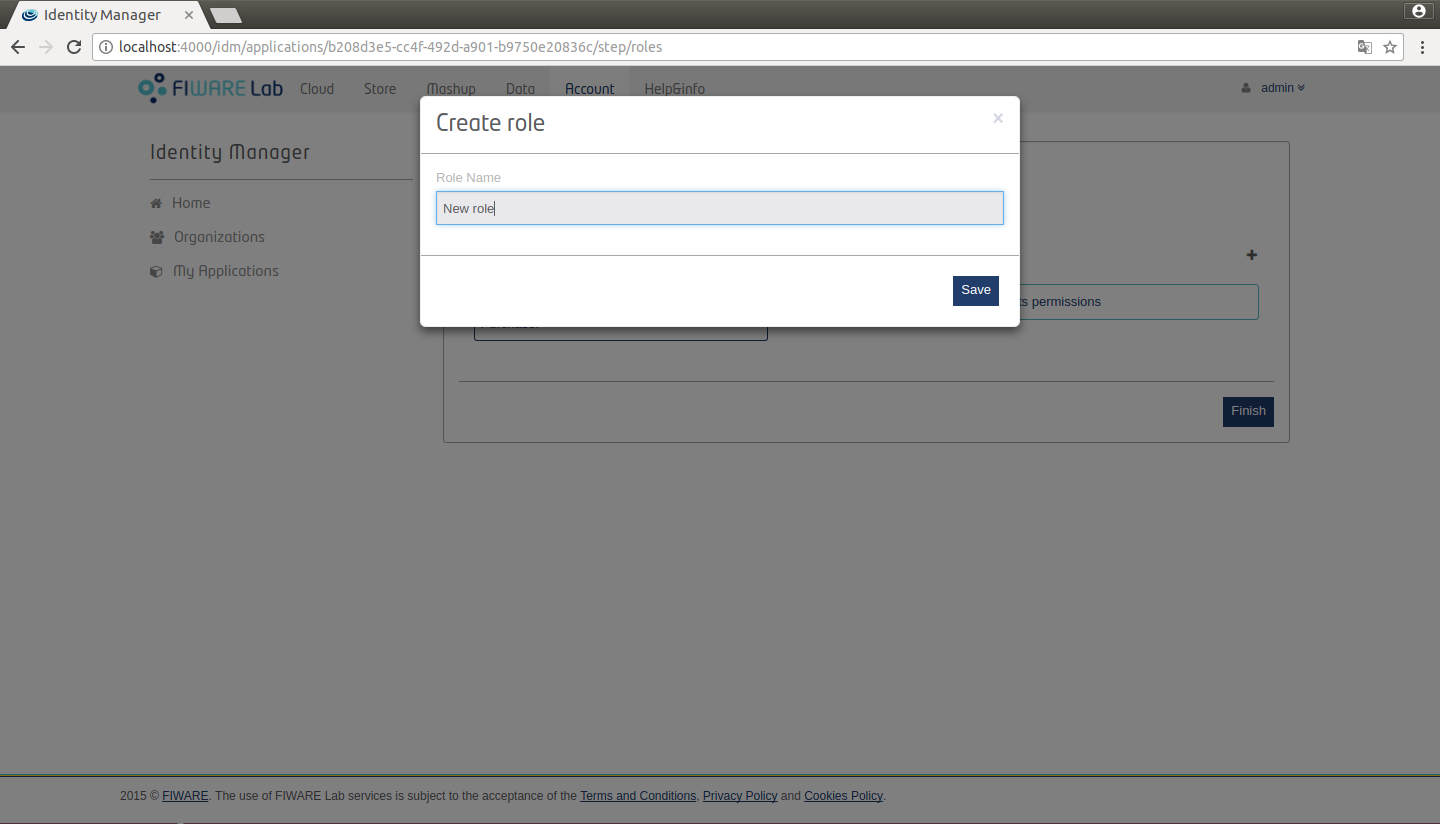
Figure 12: Create a role
You are also permitted to add up new permissions by clicking on "New Permission". Here you need to enter the name of the permission, description, HTTP verb (GET, PUT, POST, DELETE) and the Path to that permission. Click "Create Permission" and "Finish" to finalize with creating the application.
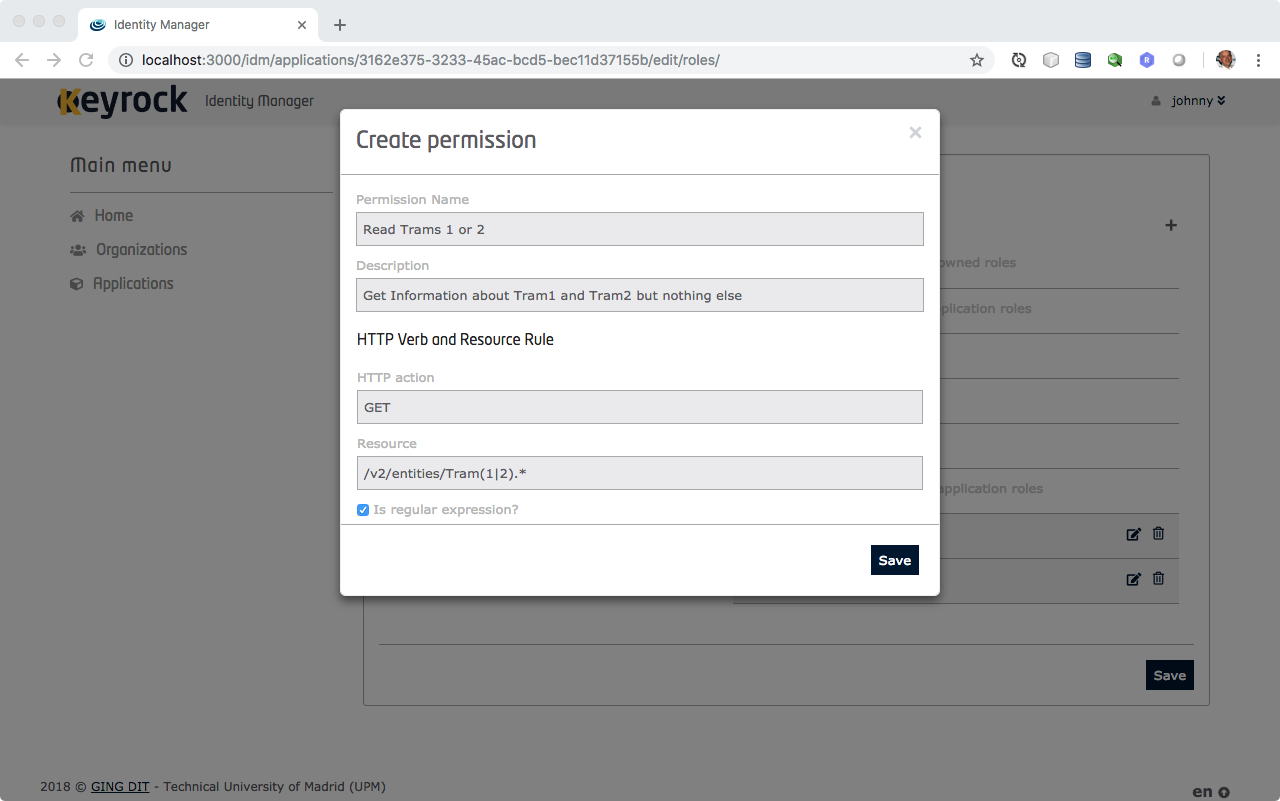
Figure 13: Create a permission
You can also configured a specific XACML rule if you need it.
In addition you can edit and delete all the roles and permissions that you have created by clicking in the corresponding buttons.
You can configure the permissions for the new role by activating the correspondng check box. Click "Save" button to create the new assignment.
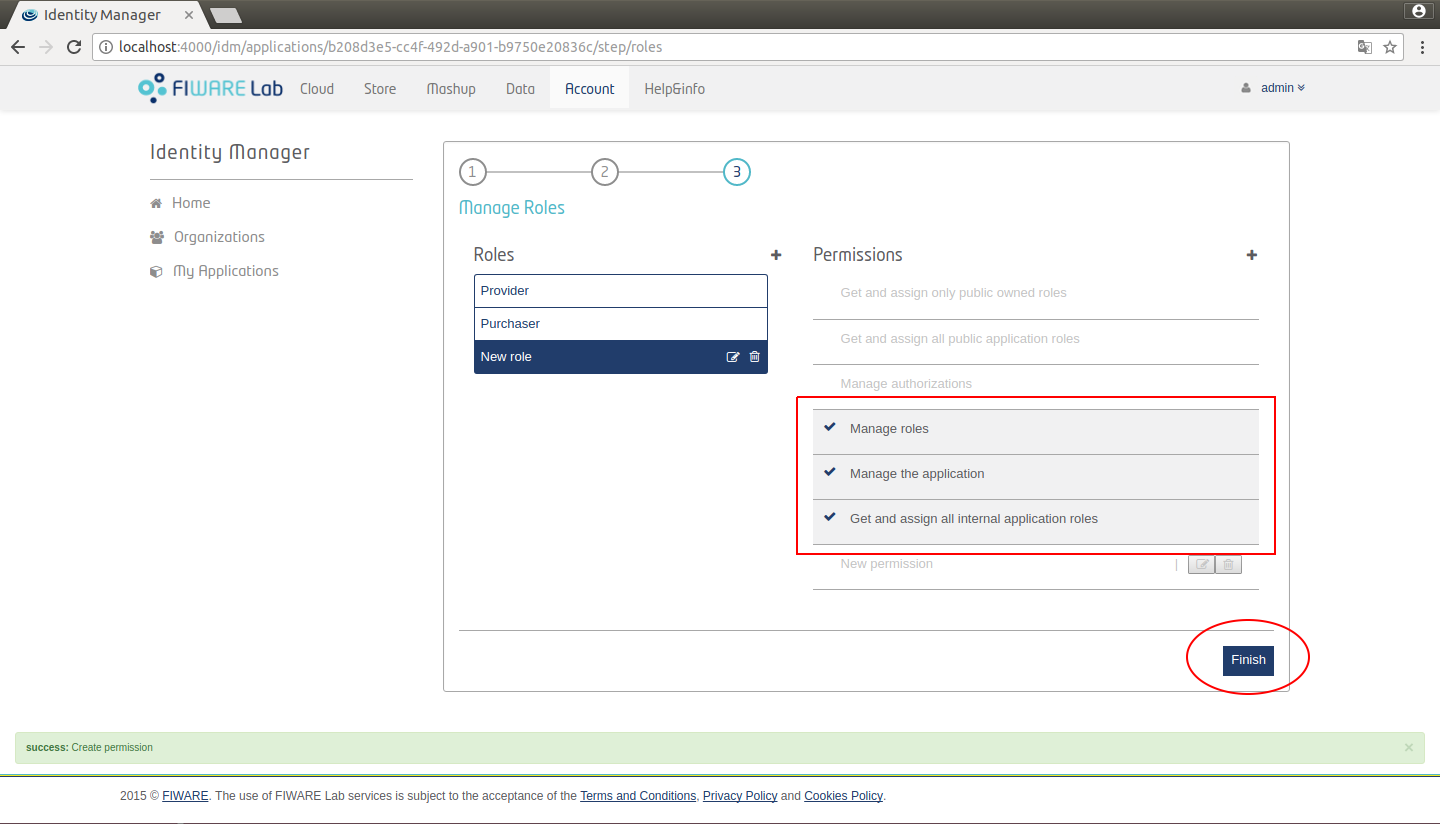
Figure 14: KeyRock New assignment
Show application
Once you have created an application, you are redirected to the page where all the information is displayed. You can also access this information by clicking in the corresponding application from the My Applications page. The Oauth2 credentials of the application are displayed in this page.
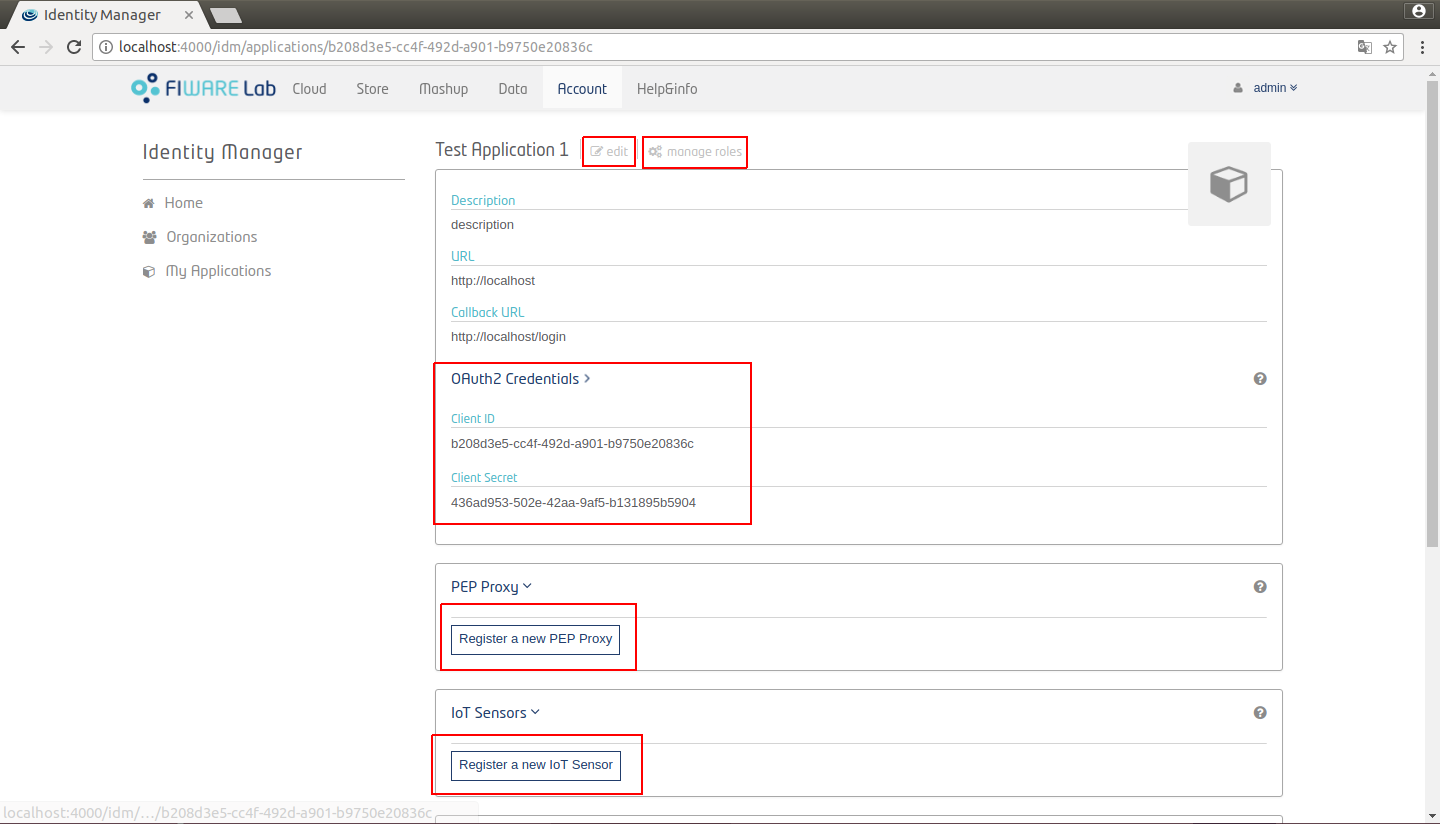
Figure 15: Application view
You can also perform several actions:
-
Edit the application. Here you can change applications attributes: name, description, url, redirect_uri and logo.
-
Manage roles. Explained in the previous section.
-
Register a Pep Proxy.
-
Register an IoT Agent.
-
Authorize users.
-
Authorize organizations.
-
Authorize trusted applications.
Register Pep Proxy and IoT Agents
For each application you can register a Pep Proxy in order to enable authentication and authorization via Oauth2. You can also register some IoT agents in the application to provide lightweight security mechanisms to yours IoT devices.
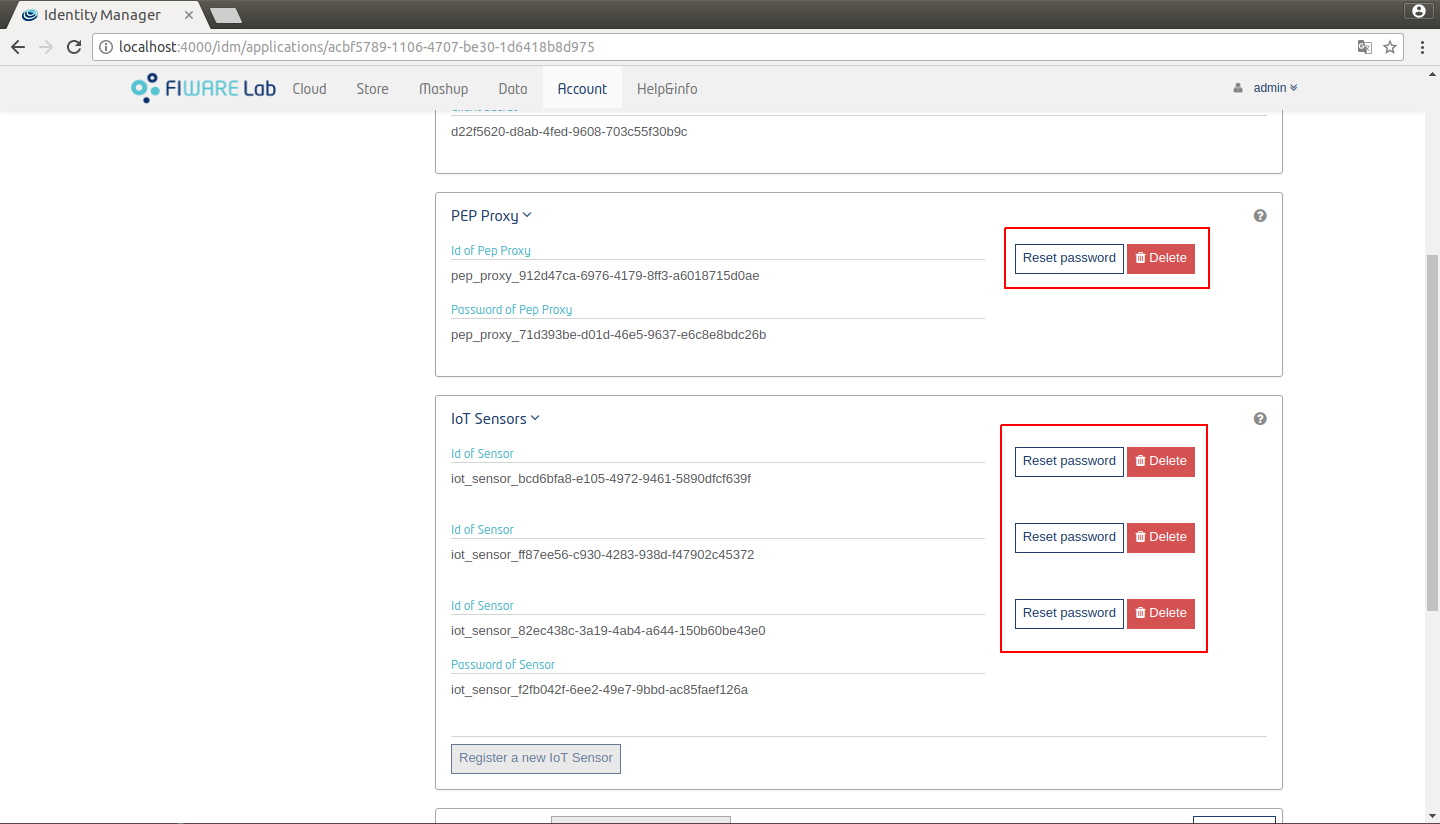
Figure 16: Pep Proxy and Iot Agents register
You can also reset passwords of this components or delete them.
Authorize users and organizations
You can add users or organizations in the application by clicking on the "Authorize" button.
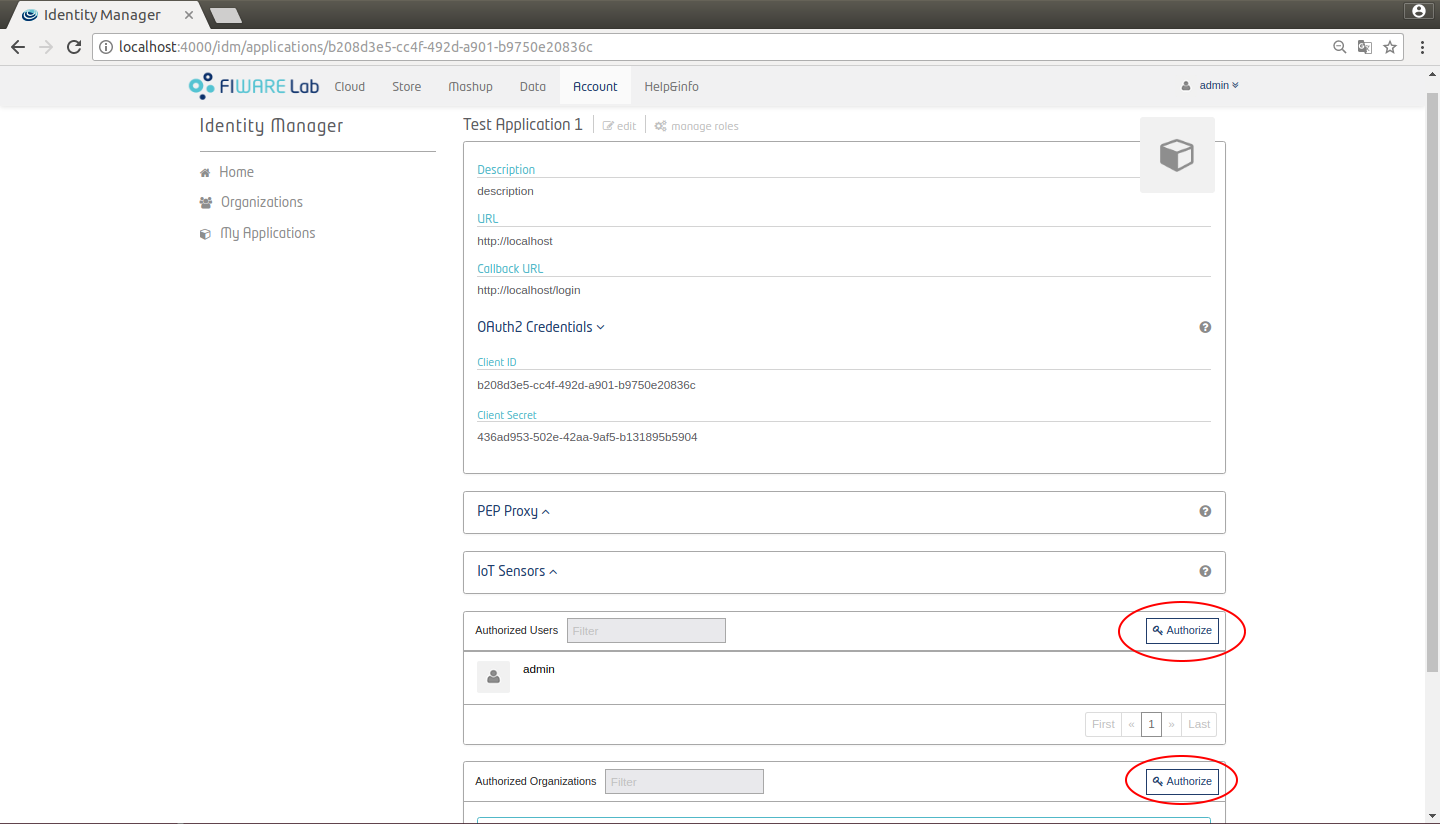
Figure 17: KeyRock authorize
It shows a modal where you can manage Users and Groups. You can see the users or organizations and their initially assigned roles. You can search users or organizations in the right column. Note that you can assign roles after the user or organization have been added, by clicking on the roles drop down menu - below the user's icon, as shown on Figure 18 and Figure 19.
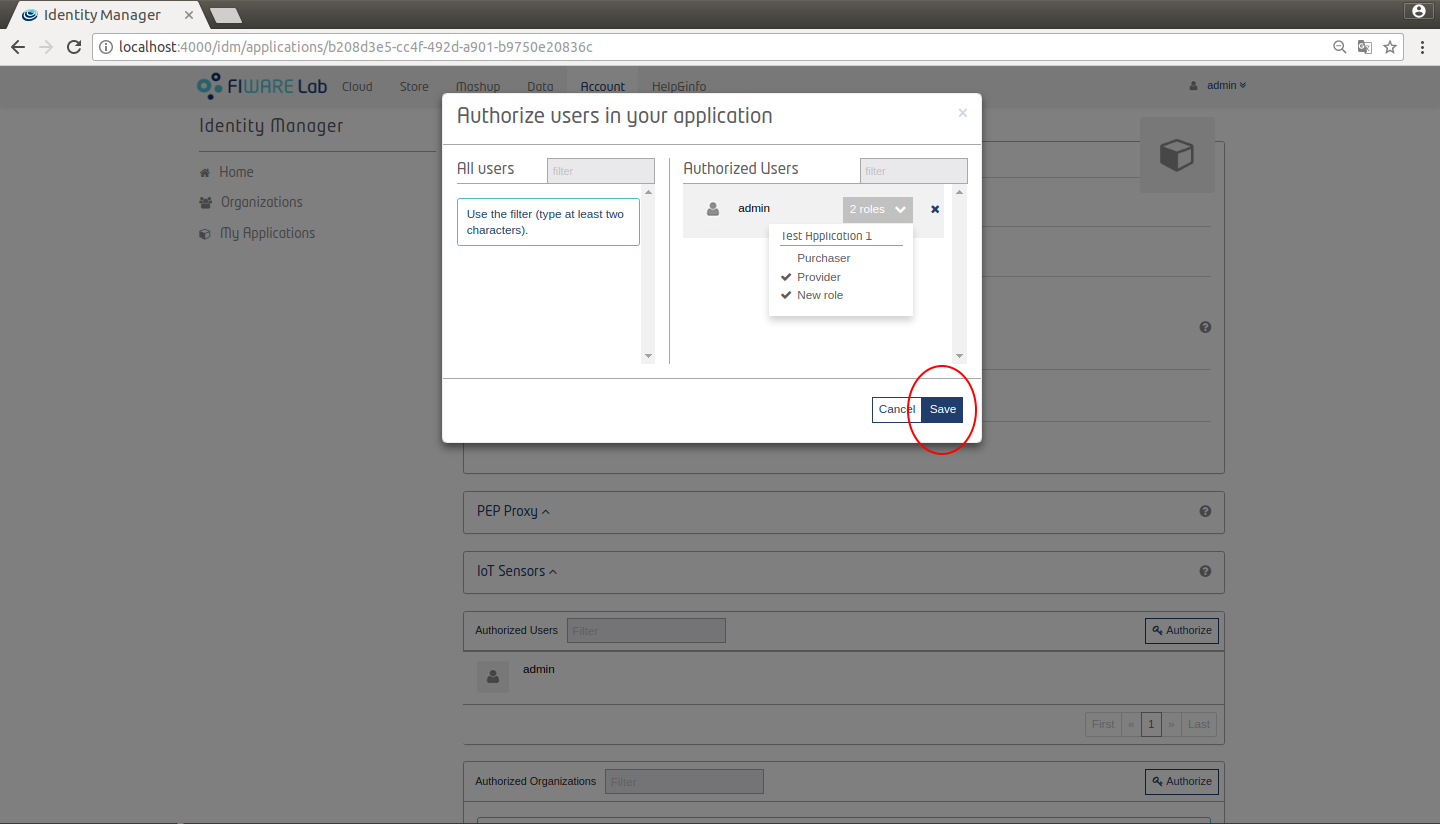
Figure 18: KeyRock Authorize users
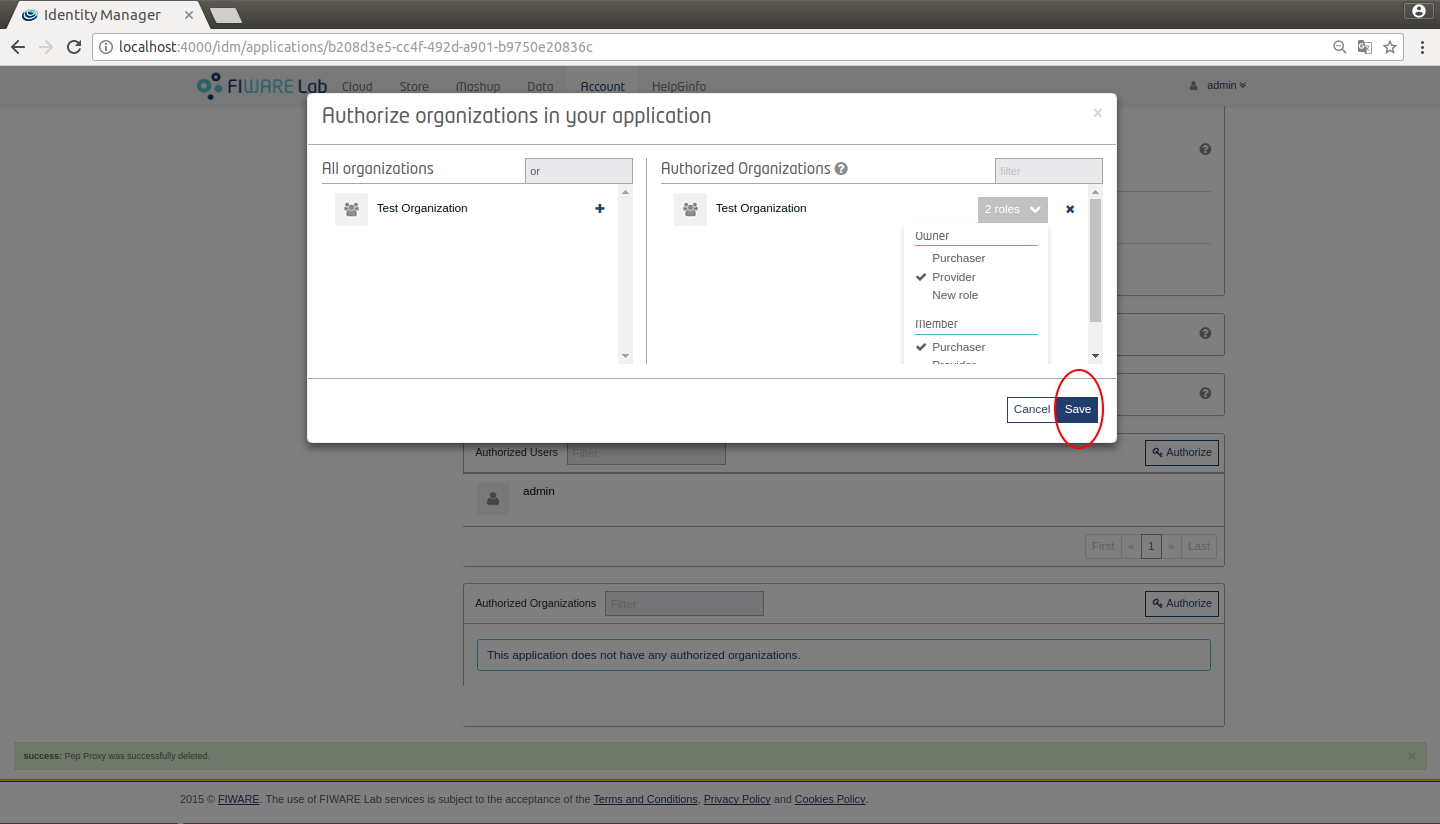
Figure 19: KeyRock Authorize organizations
When you assign roles to an organization, you assign it to the users who are owners or memebers of the application. In next section is explained more in detail how to manage organizations.
Authorize trusted applications
When validating permissions in Keyrock's built-in PDP as explained here the application in which the permission was created and assigned to the user is checked.
Keyrock allows application owners to trust in other applications. Thus, a PDP check will validate if the user has an specific permission in the current application or in one of the applications in which it trusts. For adding trusted applications you can use the API or the web interface:
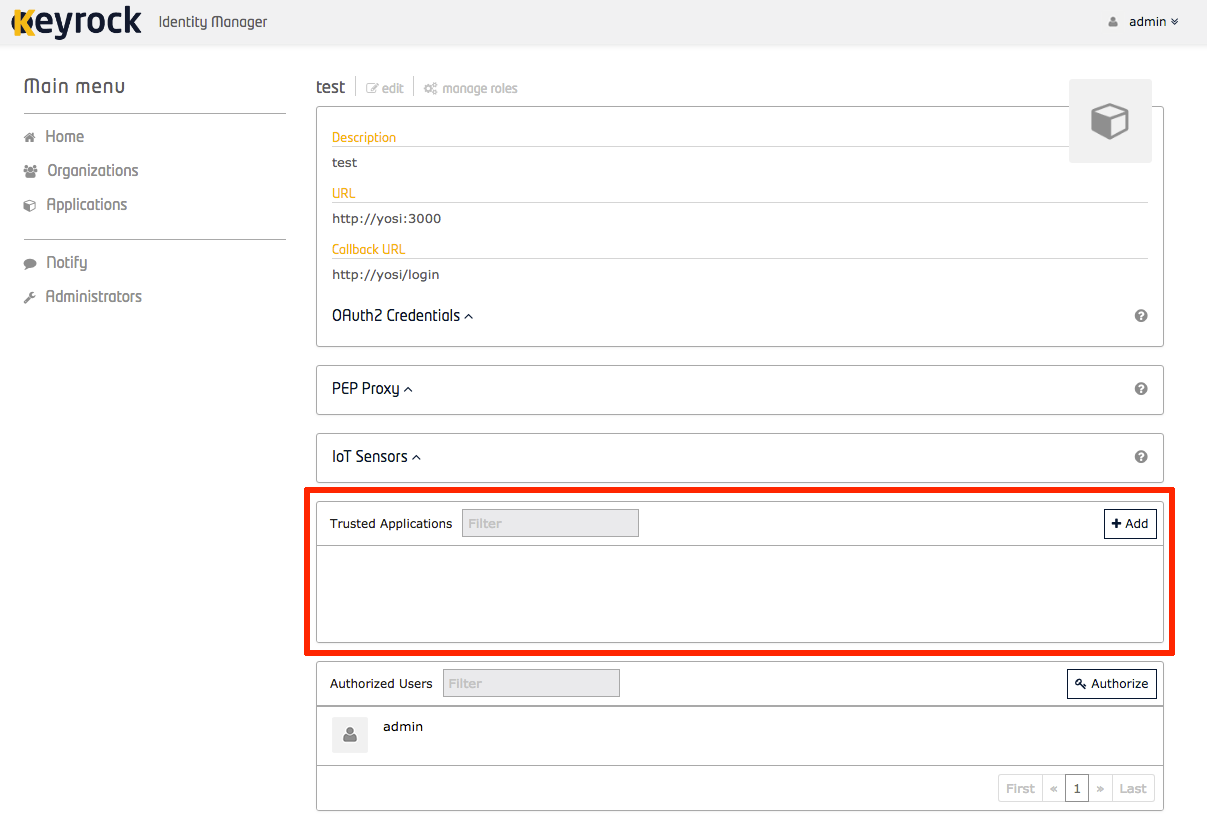
Figure 20: KeyRock Trusted Applications