Installation and Administration Guide
Introduction
Welcome to the Installation and Administration Guide for the Identity Management - KeyRock Generic Enabler. This section will cover how to install, configure and administrate a working instance of KeyRock.
Requirements
In order to execute Keyrock, it is needed to have previously installed the following software:
- Node.js (http://nodejs.org/download/).
- Node Packaged Modules. It is usually included within Node.js (https://npmjs.org/).
- MySQL (https://www.mysql.com/)
System Installation
The following steps need to be performed to get Keyrock up and running:
-
Download the software, using GitHub.
git clone https://github.com/ging/fiware-idm -
Install all required libraries using NPM.
cd fiware-idm npm install -
Configure the installation. To configure Keyrock you can copy the file named config.js.template to config.js.
cp config.js.template config.js -
Edit it with the corresponding with basic info. Below you can see an example:
Configure port and host:
    config.host = 'http://localhost:3000';
    config.port = 3000
Configure database:
    config.database = {
        host: 'localhost',
        password: 'idm',
        username: 'root',
        database: 'idm',
        dialect: 'mysql'
    }
Configure session key:
    config.session = {
        secret: 'nodejs_idm'
    }
Configure password encryption:
    config.password_encryption = {
        key: 'nodejs_idm'
    }
-
Create database, run migrations and seeders:
npm run-script create_db npm run-script migrate_db npm run-script seed_db -
Launch the server:
npm start -
You can also install forever.js to run it in a production environment:
sudo npm install forever -g -
And then run the server using forever:
forever start bin/www -
To know the status of the process you can run the next command:
forever status
Enable HTTPs
Follow the next steps in order to enable the server to listen to HTTPs requests.
-
Generate OpenSSL certificates.
./generate_openssl_keys.sh -
Enable HTTPs in config.js.
    config.https = {
        enabled: true,
        cert_file: 'certs/idm-2018-cert.pem',
        key_file: 'certs/idm-2018-key.pem',
        port: 443
    }
- Start server with admin rights
sudo npm start
External Authentication
You can also configure the Identity Manager to authenticate users through an external database.
When using this option, after the user correclty authenticates using his/her remote credentials, a local copy of the user is created. For authenticating the user externally Keyrock needs to read a set of user attributes from the external database. These attributes are:
- id: A unique identifier of the user. The local copy of the user will have an identifier with the result of concatenating the configured prefix (config.external_auth.id_prefix) and the external id.
- username: the display name of the user
- email: the email address is the value used for authenticating the user
- password: the encrypted password of the user
- password_salt: if not specified, the value set in config.external_auth.password_encryption_key will be used for checking the password encryption.
It is very common that the external database does not have a table with these parameters. In such case you can create a database view for exposing them.
If your external database has the user data separated in two tables named USERS and ACTORS with the following structure:
USERS Table
| id | encrypted_password | password_salt | created_at | last_sign_in_at | actor_id |
|---|---|---|---|---|---|
| 1 | g34h432hjk54k2j | 1234 | 2015-06-10 08:26:02.0113 | 2018-06-10 08:26:02.0113 | 12 |
| 2 | 2h43h7fdj38302j | 1234 | 2015-01-10 08:26:02.0113 | 2018-01-10 08:26:02.0113 | 22 |
| 3 | j328478j328j423 | 1234 | 2015-02-10 08:26:02.0113 | 2018-10-10 08:26:02.0113 | 5 |
ACTORS Table
| id | name | logo | |
|---|---|---|---|
| 12 | Melinda López | melinda@test.es | http://mylogo.es/12344 |
| 22 | Juanli Jons | juanli@test.es | http://mylogo.es/12121 |
| 5 | Lesha Magnen | lesha@test.es | http://mylogo.es/1212 |
You can create a view with the SQL statement
CREATE VIEW USER_VIEW AS
    SELECT USERS.id, USERS.password_salt, USERS.encrypted_password as password, ACTORS.email, ACTORS.name as username
    FROM USERS,ACTORS
    WHERE USERS.actor_id = ACTORS.id;
And this will create a view with the structure Keyrock needs to authenticate users:
USER_VIEW Table
| id | password_salt | password | username | |
|---|---|---|---|---|
| 1 | 1234 | g34h432hjk54k2j | melinda@test.es | Melinda López |
| 2 | 1234 | 2h43h7fdj38302j | juanli@test.es | Juanli Jons |
| 3 | 1234 | j328478j328j423 | lesha@test.es | Lesha Magnen |
For enabling this external authentication you have to modify config.js file customizing the database attributes.
config.external_auth = {
    enabled: true,
    id_prefix: 'external_',
    password_encryption_key: undefined,
    ecryption: 'bcyrpt',
    database: {
        host: 'localhost',
        port: undefined,
        database: 'idm',
        username: 'root',
        password: 'idm',
        user_table: 'user_view',
        dialect: 'mysql'
    }
}
The way to check password validity can be customized in with parameter external_auth.encryption. SHA1 and BCrypt are currently supported.
Authorization
Configure Policy Decision Point (PDP) - IdM can perform basic policy checks (HTTP verb + path) - AuthZForce can perform basic policy checks as well as advanced
If authorization level is advanced you can create rules, HTTP verb+resource and XACML advanced. In addition you need to have an instance of authzforce deployed to perform advanced authorization request from a Pep Proxy. If authorization level is basic, only HTTP verb+resource rules can be created
In order to allow this characteristic you need to edit the config file:
    config.authorization = {
        level: 'basic', // basic|advanced
        authzforce: {
            enabled: false,
            host: 'localhost',
            port: 8080
        }
    }
You can configure the IdM to send emails to users. Follow this tutorial to configure Postfix as a Send-Only SMTP Server on Ubuntu 14.04. Then edit config file:
    config.mail = {
        host: 'idm_host',
        port: 25,
        from: 'noreply@host'
    }
Configure themes
You can customize the appearance of the web portal. By default there are two themes: default and fiwarelab.
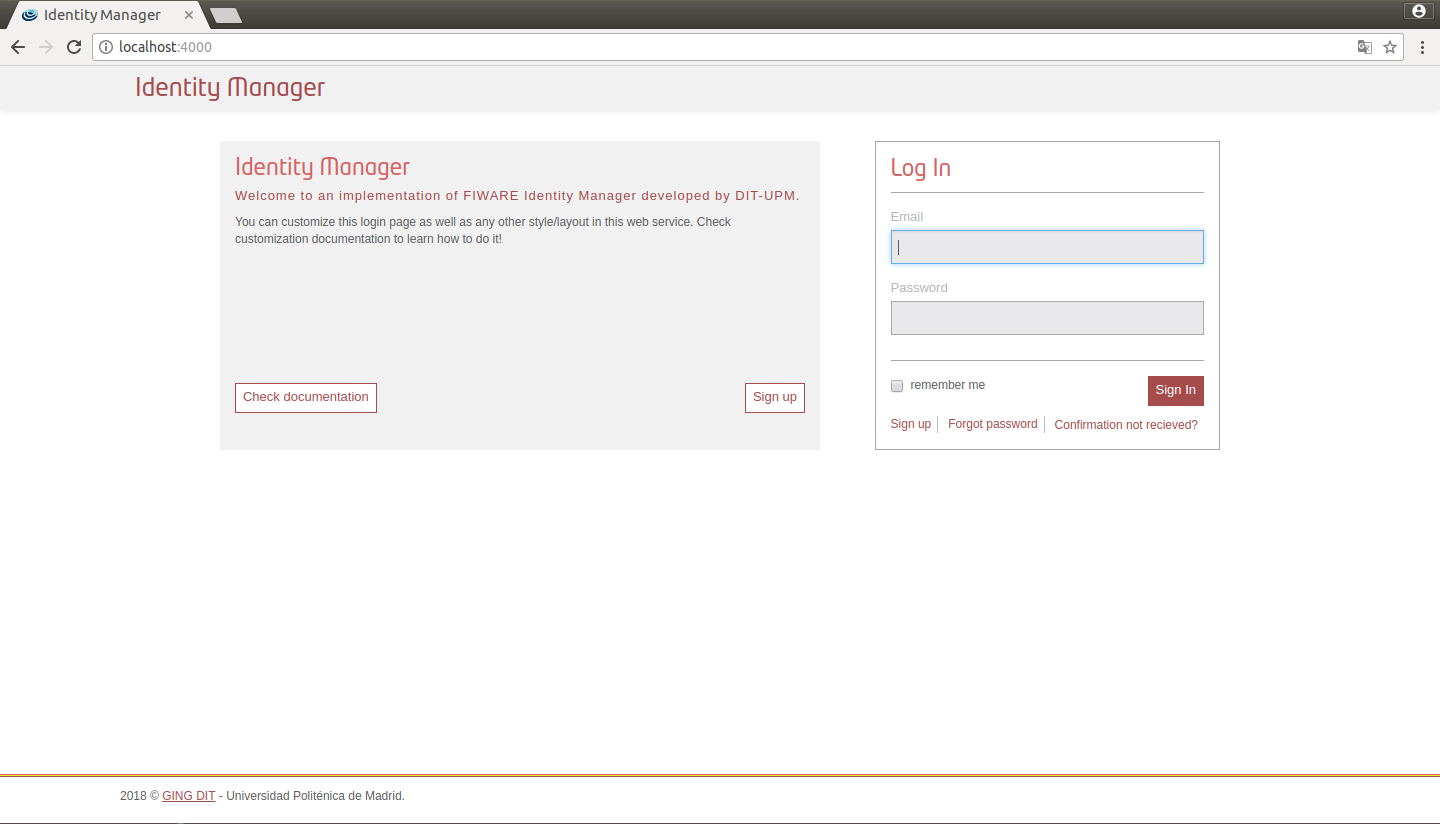
Figure 1: IdM default view
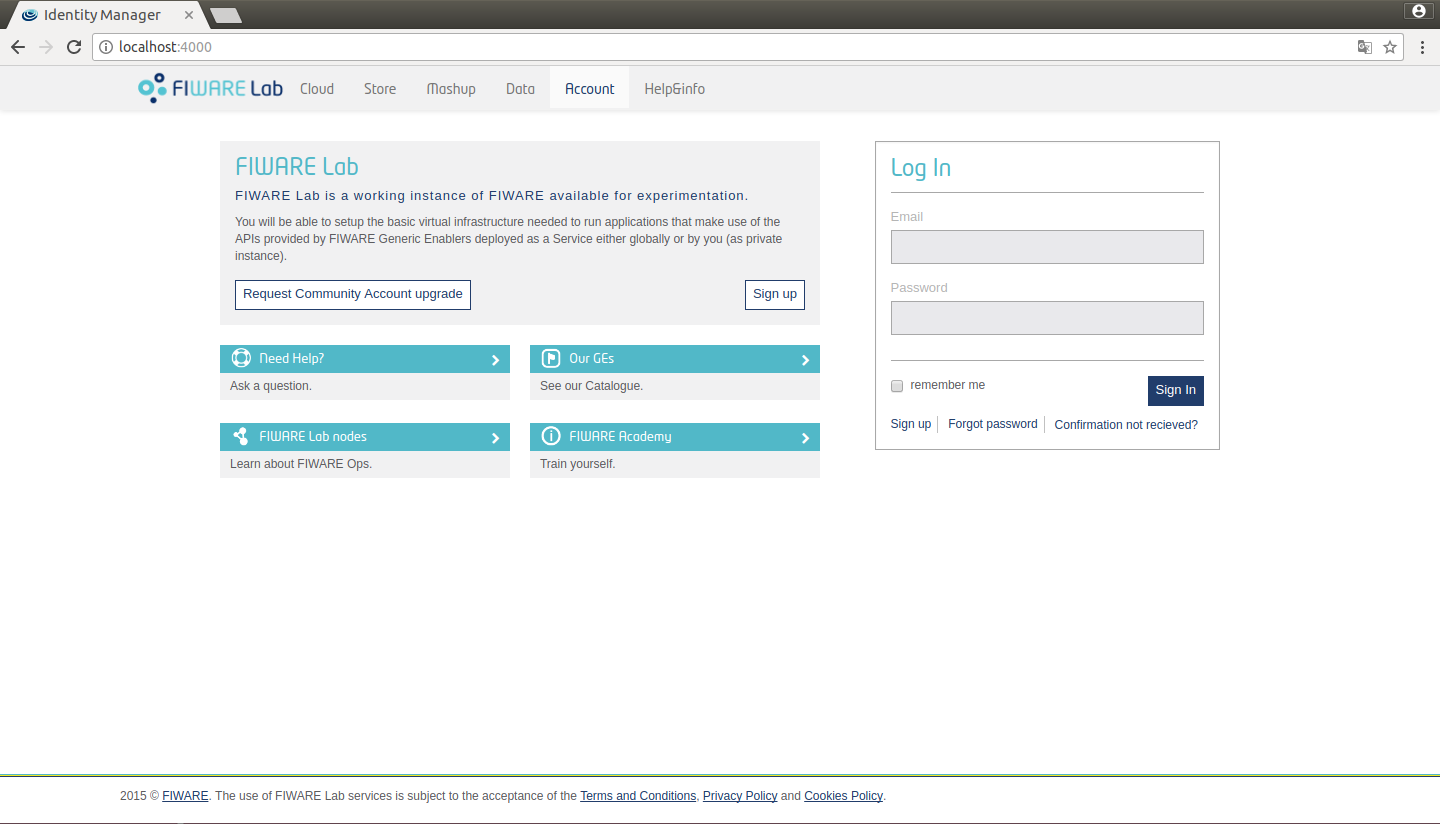
Figure 2: IdM fiware view
You can change between these themes in config.js
    config.site = {
        title: 'Identity Manager',
        theme: 'default'   // default/fiwarelab
    };
Additionally you can customize your own theme. In order to do that follow these steps:
- Create a new subfolder in themes directory
mkdir themes/example - Generate _colors.scss, _styles.scss and style.scss
cd themes/example && touch _colors.scss _styles.scss style.scss - Add these lines to style.scss
/****************************** Default colors */
@import "../default/colors";

/****************************** Custom colors */
@import "colors";

/****************************** Default styles */
@import "../default/styles_call";

/****************************** Custom styles */
@import "styles"
- Edit _colors.scss. For example:
/****************************** Custom colors rewrite */

$brand-primary: purple;
$brand-secundary: orange;
- Change config.site to use the new theme:
    config.site = {
        title: 'Identity Manager',
        theme: 'example'   // default/fiwarelab
    };
Run the Identity manager and you will see the new appearance:
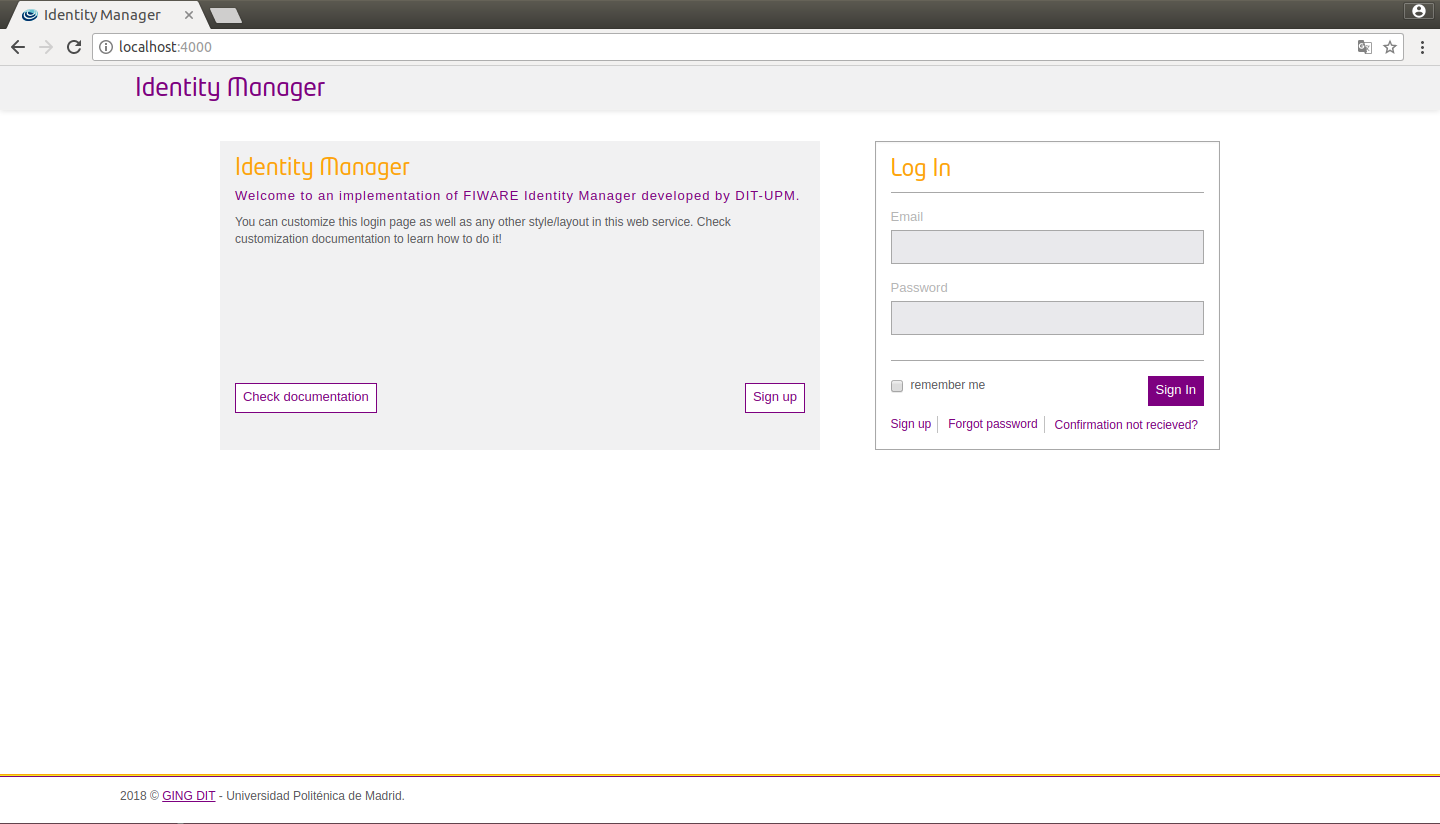
Figure 3: IdM custom view
You can also configure a new logo in _styles.scss.
/****************************** Custom styles rewrite */

.logo-header .brand {
  background-image: url(../img/example.png);
  width: 150px;
  background-size: 150px 37px;
}

.logo-header {
    float: left;
}

.presentation {
    .media {
        height: auto;
        footer {
            margin-top: 15px;
        }
    }
}
Furthermore you can customize the header, footer, presentation and help of your portal. To do that create a folder, generate files and then customize them.
mkdir themes/example/templates
cd themes/example/templates && touch _footer.ejs _header.ejs _presentation.ejs _help_about_items.ejs
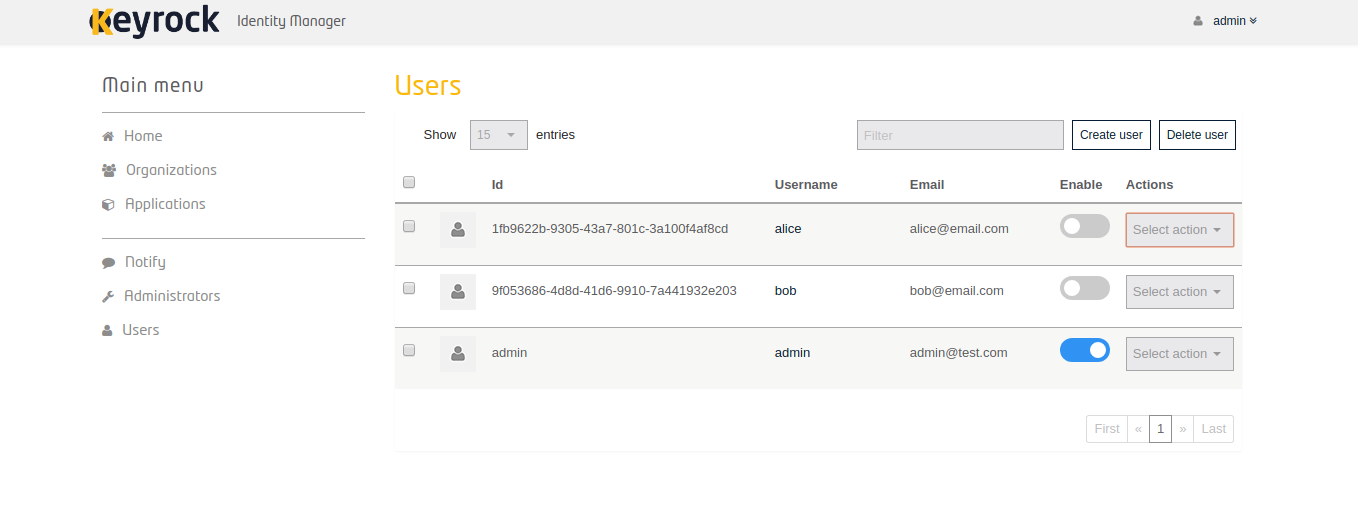
Admin Panel
Keyrock provides an interface in which administrators could easliy manage the users accounts. Actions as create, edit, delete, enable users as well as reset passwords of them could be performed through this functionality.
System Administration
To manage the mysql database you can access the console running the following command and introducing the mysql password:
mysql -u [mysql_host] -u [username] -p
Sanity Check Procedures
The Sanity Check Procedures are the steps that a System Administrator will take to verify that an installation is ready to be tested. This is therefore a preliminary set of tests to ensure that obvious or basic malfunctioning is fixed before proceeding to unit tests, integration tests and user validation.
End to End testing
- Verify that the host address of IdM can be reached. By default, web access will show a Login Page.
- Acquire a valid username and password and access with those credentials. The resulting web page is the landing page of the IdM KeyRock Portal.
- Verify that you can view the list of applications, organizations, etc.
List of Running Processes
- If you used forever, to know the status of the process you can run the next command:
forever status
Network interfaces Up & Open
- If your run the server being HTTPs enabled the TCP port 443 should be accessible to the web browsers in order to load the IdM Portal.
Databases
If you have correctly populated the database when installing the GE, the connection with it is up and running.
The databases and tables needed are:
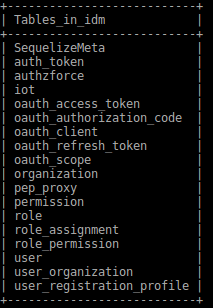
Figure 4: IdM databases table
Diagnosis Procedures
The Diagnosis Procedures are the first steps that a System Administrator will take to locate the source of an error in a GE. Once the nature of the error is identified with these tests, the system admin will very often have to resort to more concrete and specific testing to pinpoint the exact point of error and a possible solution. Such specific testing is out of the scope of this section.
Resource availability
- Verify that 2.5MB of disk space is left using the UNIX command 'df'
Remote Service Access
Please make sure port 443 is accessible.
Resource consumption
Typical memory consumption is 100MB and it consumes almost the 1% of a CPU core of 2GHz, but it depends on user demand.
I/O flows
Clients access the KeyRock Interface through the client’s Web Browser. This is simple HTTP traffic. It makes requests to the local database.